
Shortly after the OpenAI event announcing the new upcoming desktop app for ChatGPT on macOS, the web version of ChatGPT was updated and it contained a link for downloading the Mac app. This link got leaked very fast, spreading over Twitter, and allowing people to install it on their laptops. In this article, I will guide you through the process of how to get access to this application already, even if it’s not released publicly, because installing the package won’t be enough. You will also need to do some modifications in order to get in.
Prerequisites
- Bear in mind that this app will only work on MacBooks with the Apple chip, M1 or M2. It doesn’t work on Macs with Intel chips.
- It requires macOS version 14 or later (Sonoma and so on).
- As you will need to modify some network requests, you will need a separate application in order to do that. In this article, I suggest using Proxyman free version.
If you can fulfil all these requirements, let’s proceed 👇
Step-by-Step Guide
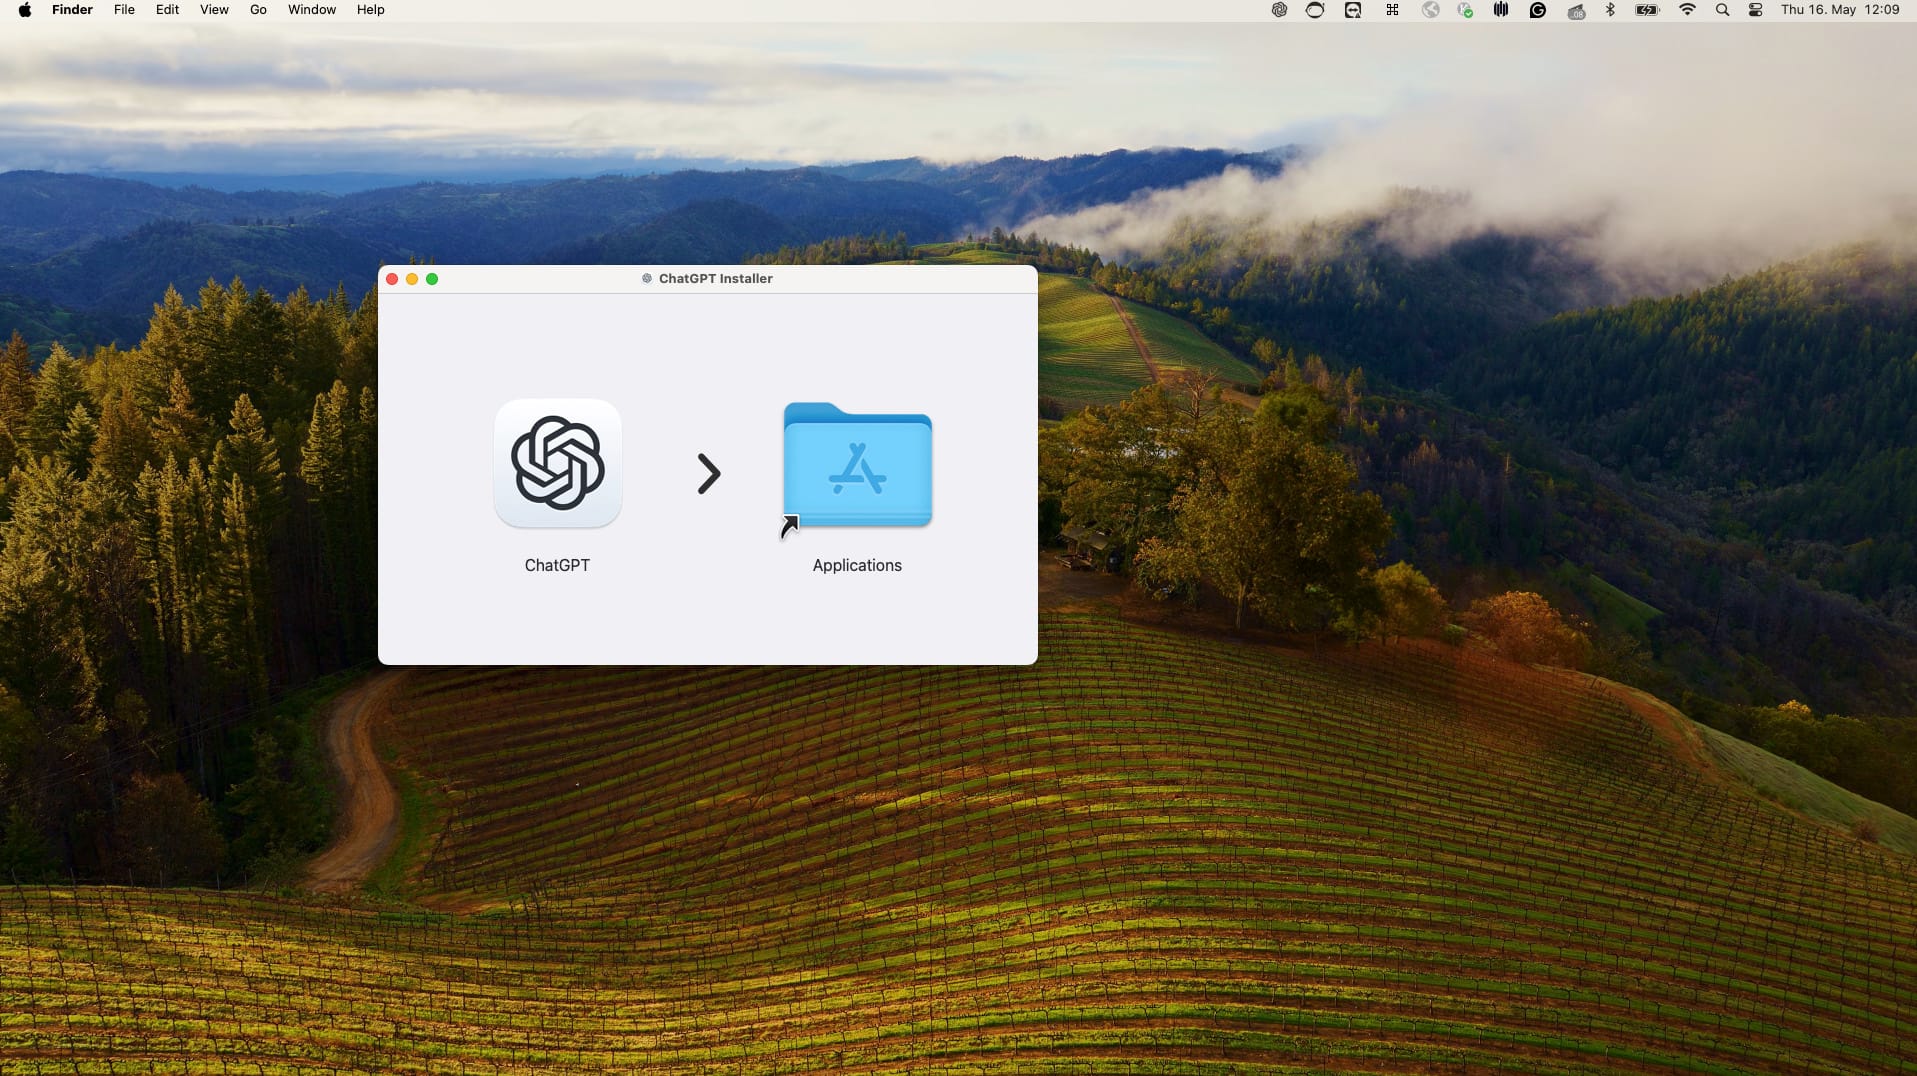
1. Download the DMG Installation File: First of all, you need to download the DMG installation file from the official mirror. Here is the public link. You can verify the URL if you want to make sure that it is legit. After downloading the package, you can simply install it and launch it on your laptop. Shortly after, you will see the login screen, but when you attempt to log in, it won’t be possible because the access is restricted to a very small subset of testers at this moment.
Download Proxyman: As a second step, you will need to download Proxyman through this link. The free version allows you to overwrite one network request, which should be enough for this task. As soon as you launch it, you will also need to open the OpenAI application again.

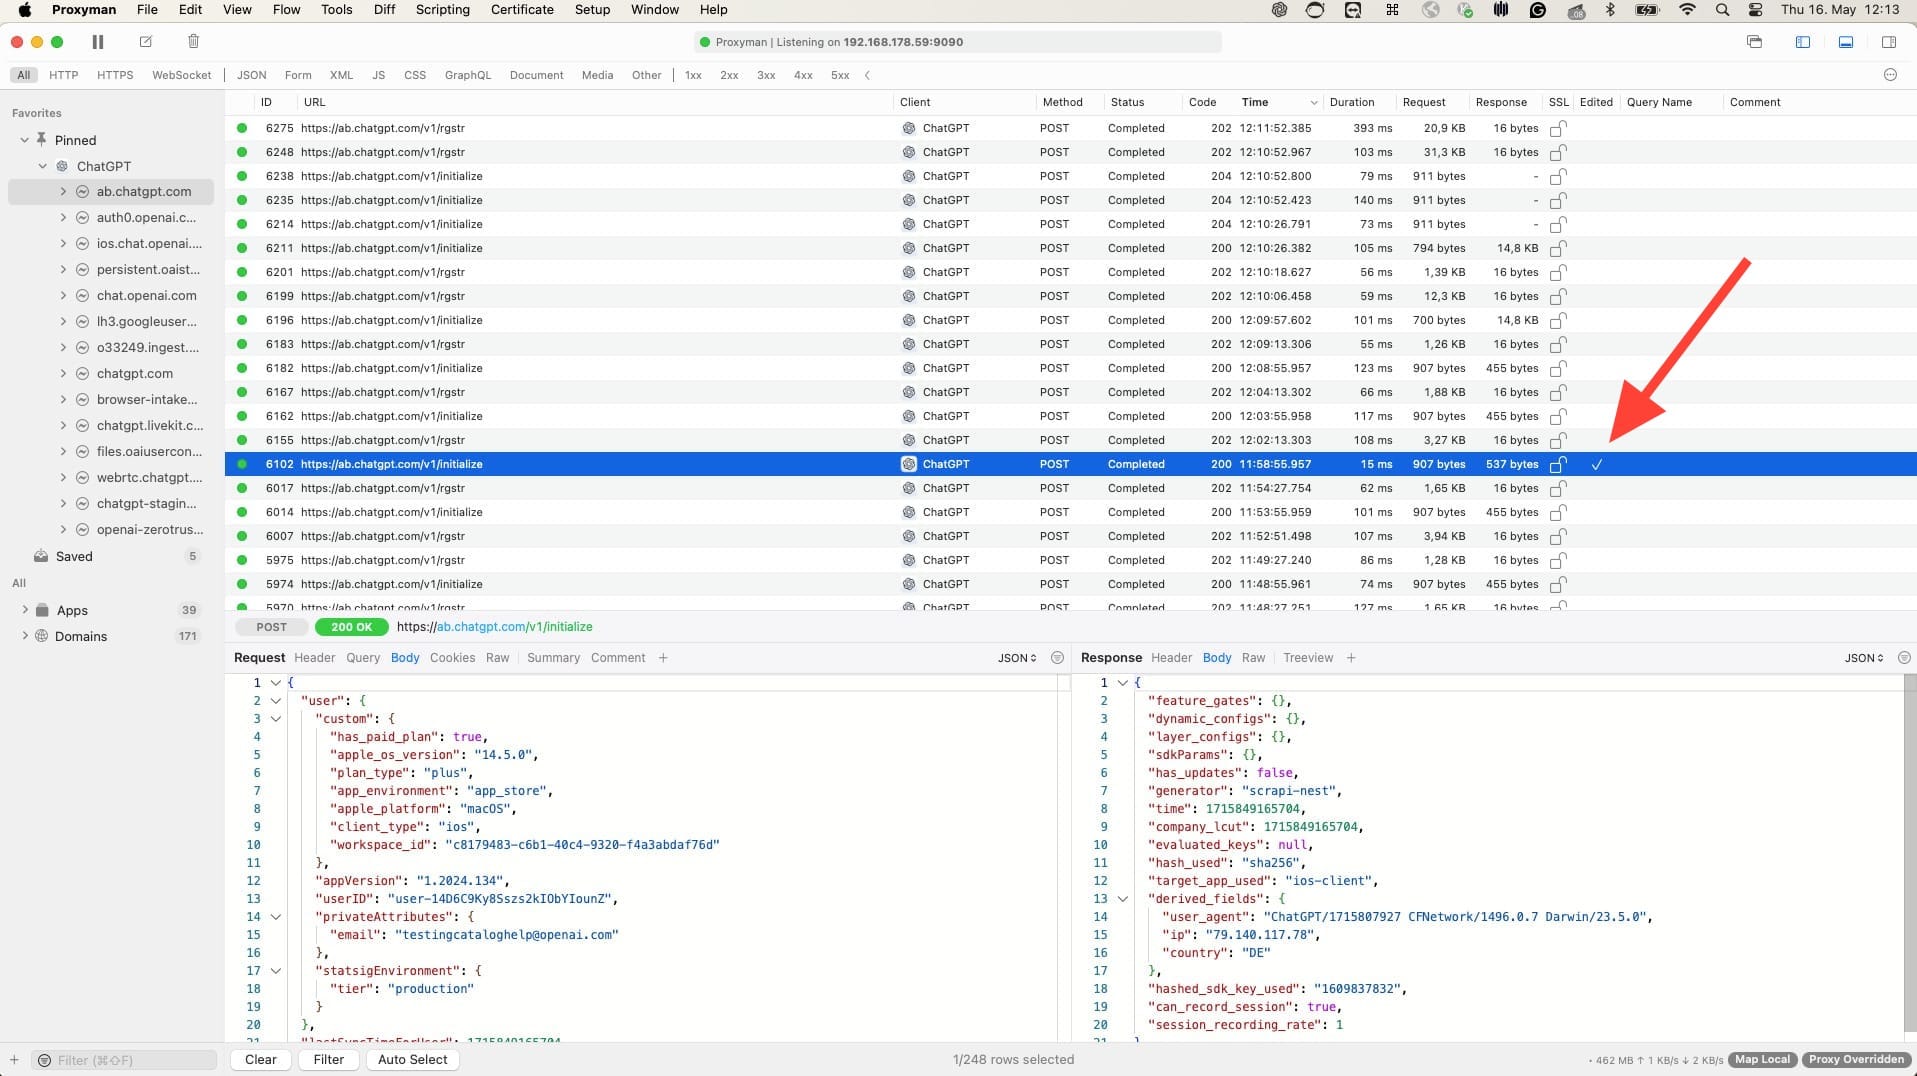
Monitor Network Activity: On the Proxyman interface, you will see some network activity coming from the ChatGPT app, but you won’t be able to see its content at first. You will need to click on the new request and enable the SSL proxy for them first. After this is done, you can kill the ChatGPT app and open it again. As soon as you click on the network activity in Proxyman, you will see the content of these API calls.
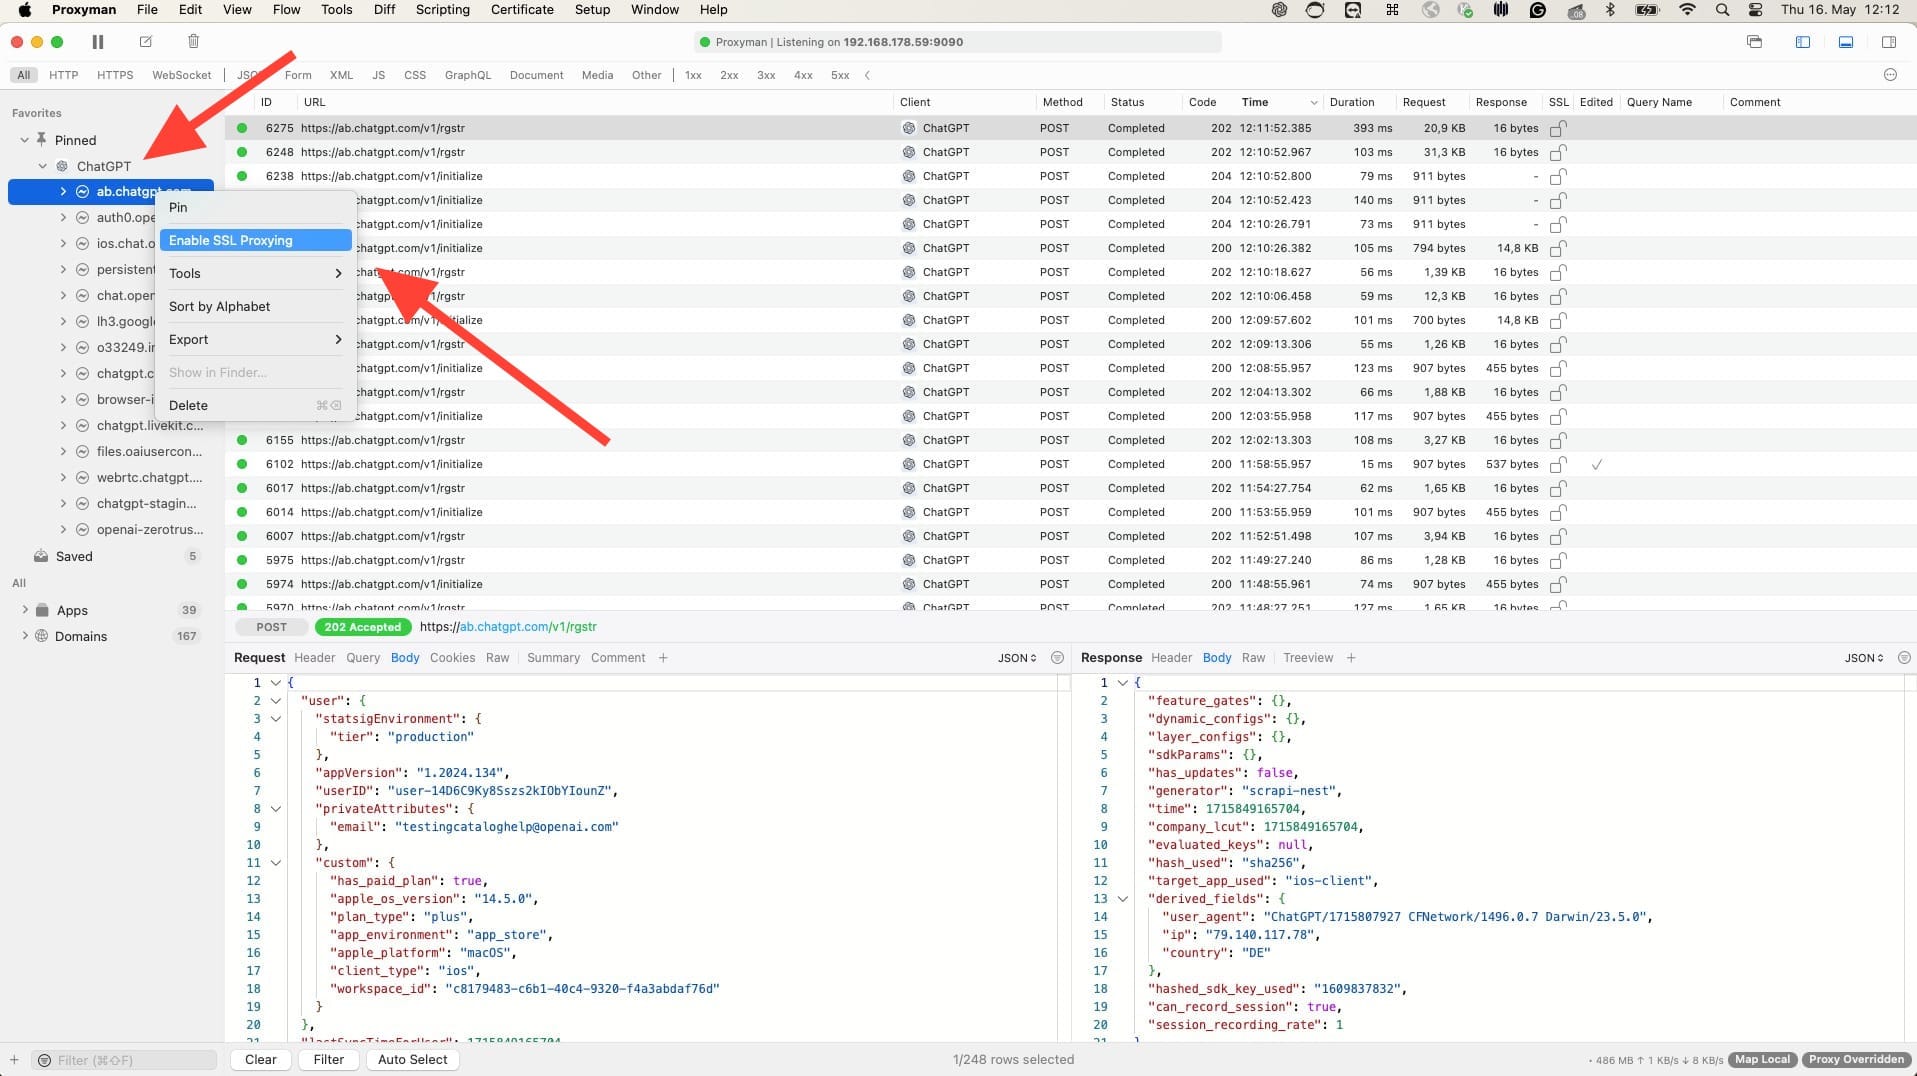
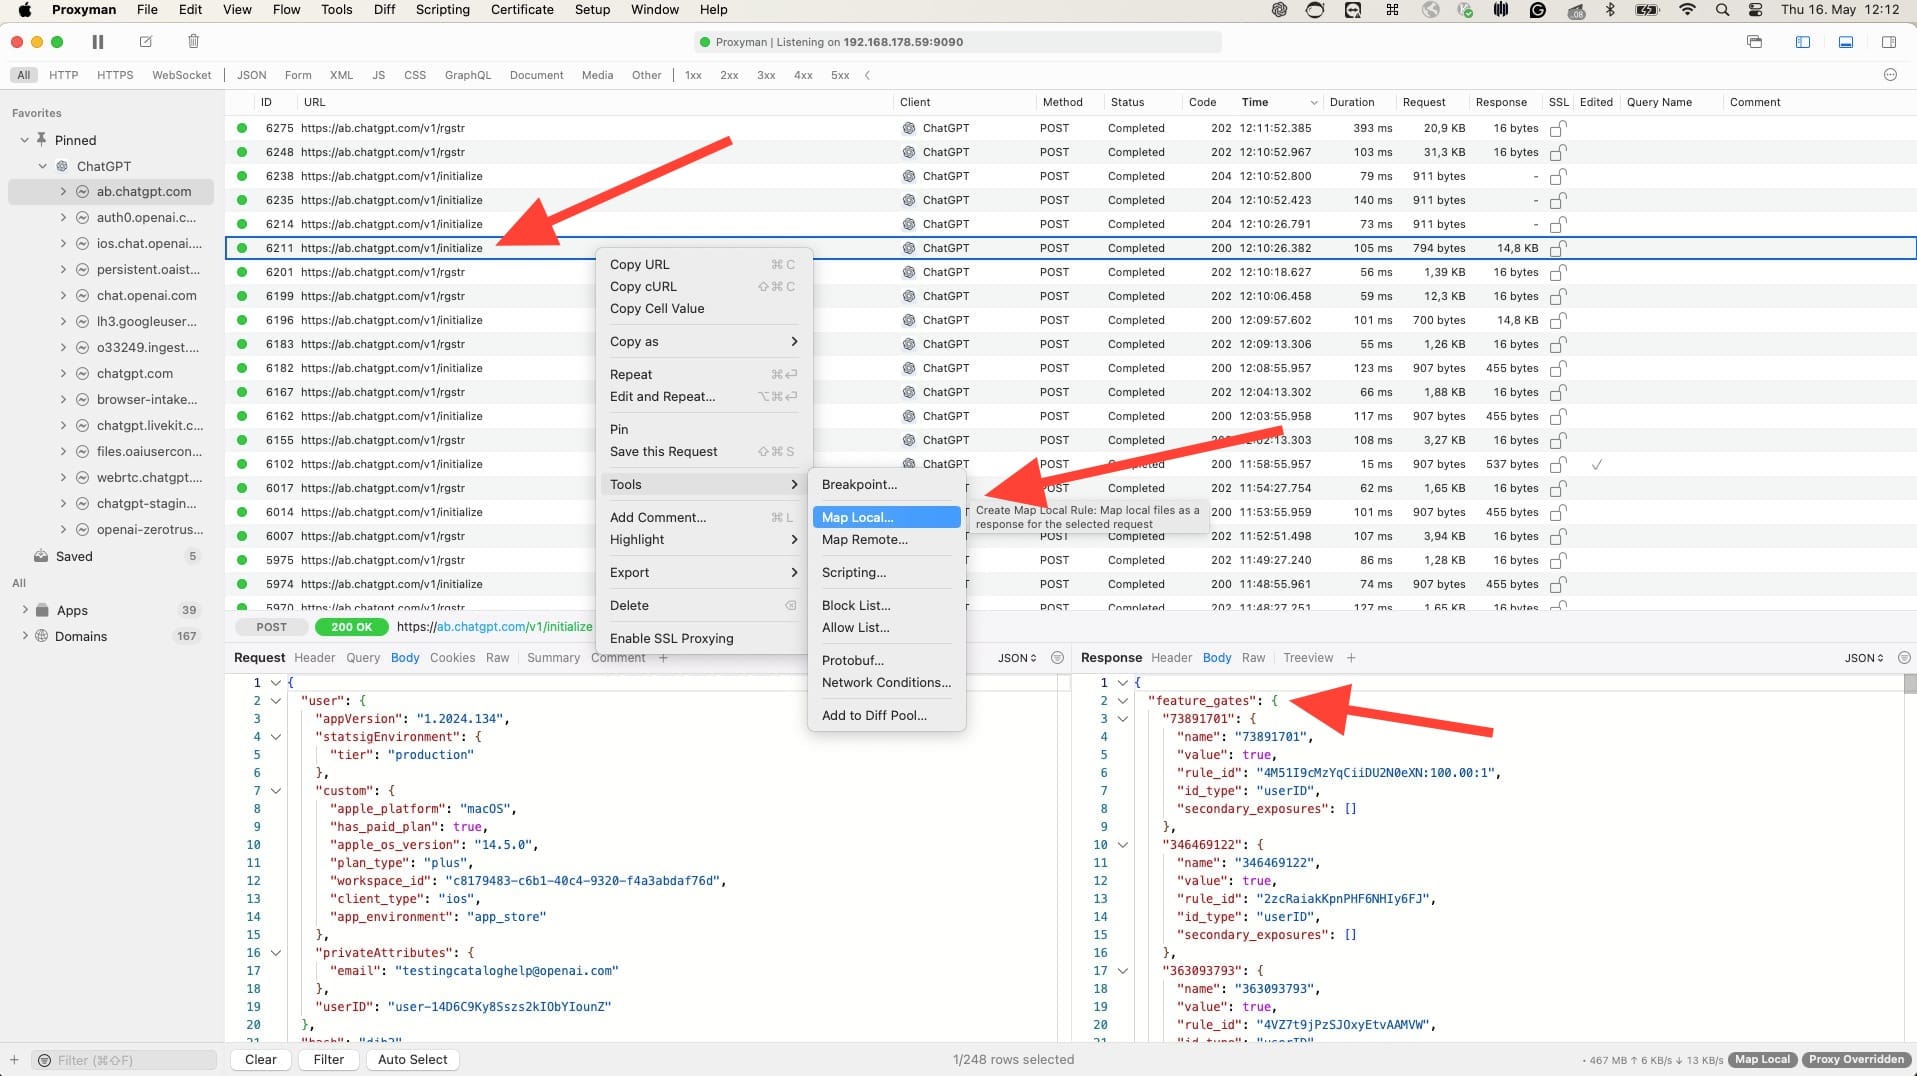
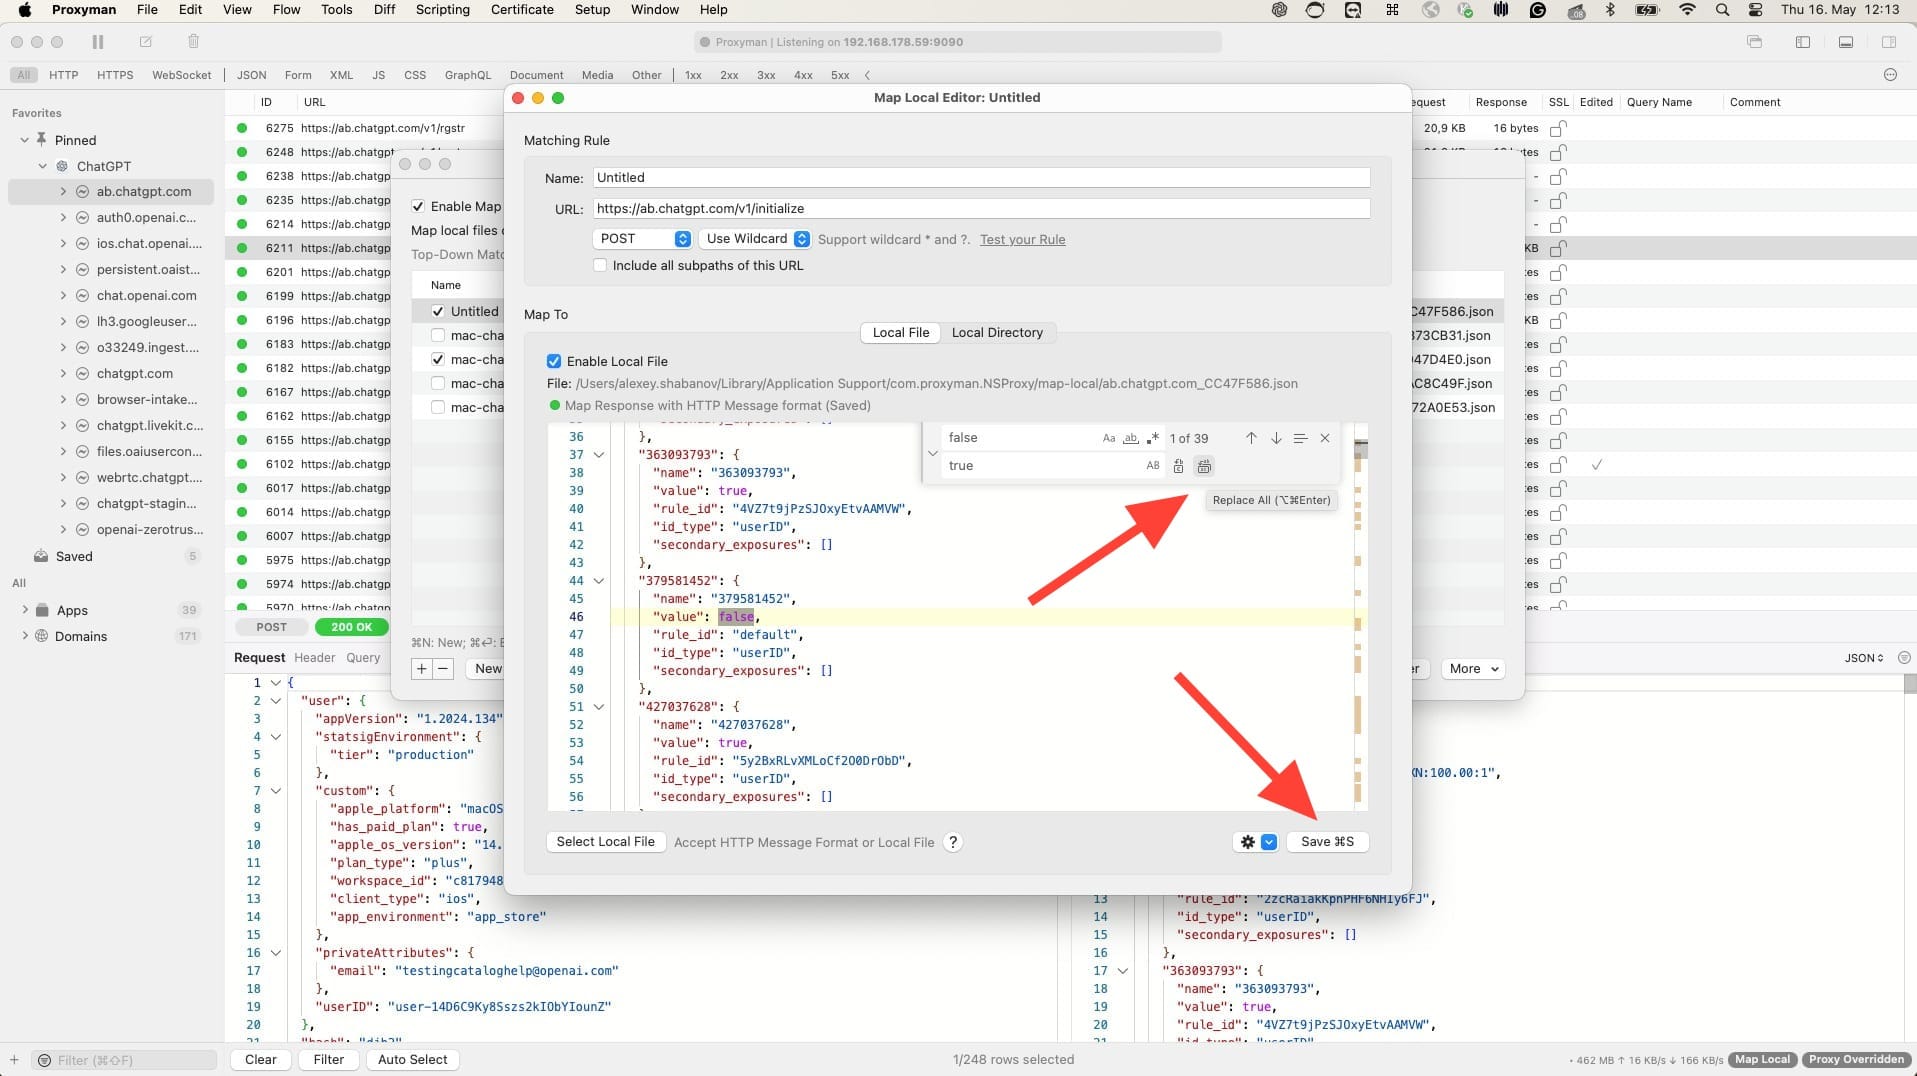
Modify Network Requests: The particular API call we are interested in is to a domain called ab.chatgpt.com and the path will contain the /initialize prefix. When you open this initialize request, you can right-click on it, select tools, map local, and then in the editor which will open afterwards, you can press Cmd + F to open the search window. Search for all places where it says false and replace those with true. With the built-in editor, it can be done in one click. After it is done, you can save it with Cmd + S or the save button, and then close this window. Make sure that you have enabled the “map local tool” checkbox.
Reopen ChatGPT App: After you close the window, you need to close the ChatGPT app again and then reopen it. In the network tab, you will see that the next initialize call will be overridden. You can see it as a checkmark in the edited column on the Proxyman UI. After that, if you try to log into the app, it will let you in.
Enjoy the App: Once it’s done, you will be able to enjoy all the public functionality that is available, including auto-updates. You will be able to receive new updates for this app. You don’t need to run Proxyman every time, only if you want to log in again.
New ChatGPT mac app hacked!!
— Nick Dobos (@NickADobos) May 14, 2024
The code wizard 🧙♂️ is behind enemy lines
How you can get early access: pic.twitter.com/r8FvoNKwlk
Alternative tutorial by @NickADobos
The tool is really built for super users and is pretty pleasant to use. Voice mode should already be available with the current publicly available 4o model, and it is already very great. Enjoy!


